Most people buy a first 88-key digital piano the way they buy a microwave: read the stars, order the one that looks nice, and discover in week three that the keys fight back. I have watched that happen with transfer students for twenty-five years, and the failure is almost never the brand. It is the order of the decisions.
The instrument is one decision. The setup is four or five more, and they are the ones that determine whether you actually practice. A digital piano on a stand that rocks, at a height that makes your wrists break, with a sustain pedal skating across a hardwood floor, will end a beginner's momentum faster than any sample library ever could.
So this is a how-to. Pick the instrument, set it up properly, and run a first month that turns it into a habit instead of a piece of furniture.
Why you should trust me
I am Yuki, a classically trained pianist in Seattle. I have taught for twenty-five years, run a home studio with about thirty students a week, and played session work on the side. I have owned twelve digital pianos, from a two-hundred-dollar starter to a slab I would happily take to a session tomorrow.
Every instrument I evaluate gets the same routine: the same Bach prelude, the same Chopin nocturne, and a blues improvisation, played at the same tempos. I keep a decibel meter and a small scale for action weight, because "feels heavy" is not a measurement. The routine tells me whether an action lets me control tone with finger speed or just gets louder when I push harder. That single behavior separates a practice tool from a toy, and it is the first thing I test in a transfer student's living room.
What to sort out before the piano arrives
Buying the instrument is the easy part. These are the things that decide whether it gets played.
- A stand at the right height. Not a coffee table, not a desk. Elbows level with the tops of the keys, forearms level or sloping slightly down. If you are tall, most bundle stands are too low, and you will hunch within a week.
- A bench, not a dining chair. A bench with adjustable height is the cheapest upgrade in this entire hobby. Chairs have the wrong seat depth and no height adjustment, and you cannot fix posture with willpower.
- A pedal that stays put. Pedals slide. Put it on a rubber mat or a strip of grip tape. If the pedal wanders mid-phrase, you will stop using it, and then you will stop learning how to use it.
- Headphones with a long cable, plus an extension. Headphone jacks on the back of a unit are one of my least favorite design choices in this industry. A short extension cable routed to the front of the instrument solves it permanently.
- A power strip within reach, and a rug under everything. Small things, but they are the difference between sitting down to play and negotiating with your own furniture.
Get these in place before the box arrives. If the piano shows up and the seating is wrong, you will play for ten minutes, feel uncomfortable, and file the whole thing under "maybe later."
What "good enough" actually means
Three things matter, in this order.
Action. The action is the piano. Everything else, samples, speakers, Bluetooth, is a feature. Graded hammer action is a spectrum, not a checkbox, and the cheap end of that spectrum bounces. You feel it in fast repeated notes and in quiet passages, where a poor action will not let you play softly without losing the note entirely.
Speaker voicing. Sample quality has largely plateaued. What you hear between two instruments in the same price band is usually speaker voicing, not the recording. A great sample through a small speaker sounds like a great sample through a pillow.
Everything else. Polyphony numbers are marketing. Nobody plays two hundred and fifty-six notes at once. Do not let a specification sheet outrank how the instrument feels under your hands for twenty minutes.
One more thing: a digital piano is a practice tool first. If it does not make you want to sit down, it failed, no matter what the listing says about concert grand samples.
The two instruments I point beginners toward
I only recommend instruments with a full 88 keys and some form of weighted action, because that is the boundary of what I will teach on. Here is the budget end and the one I would buy for a student who is serious.
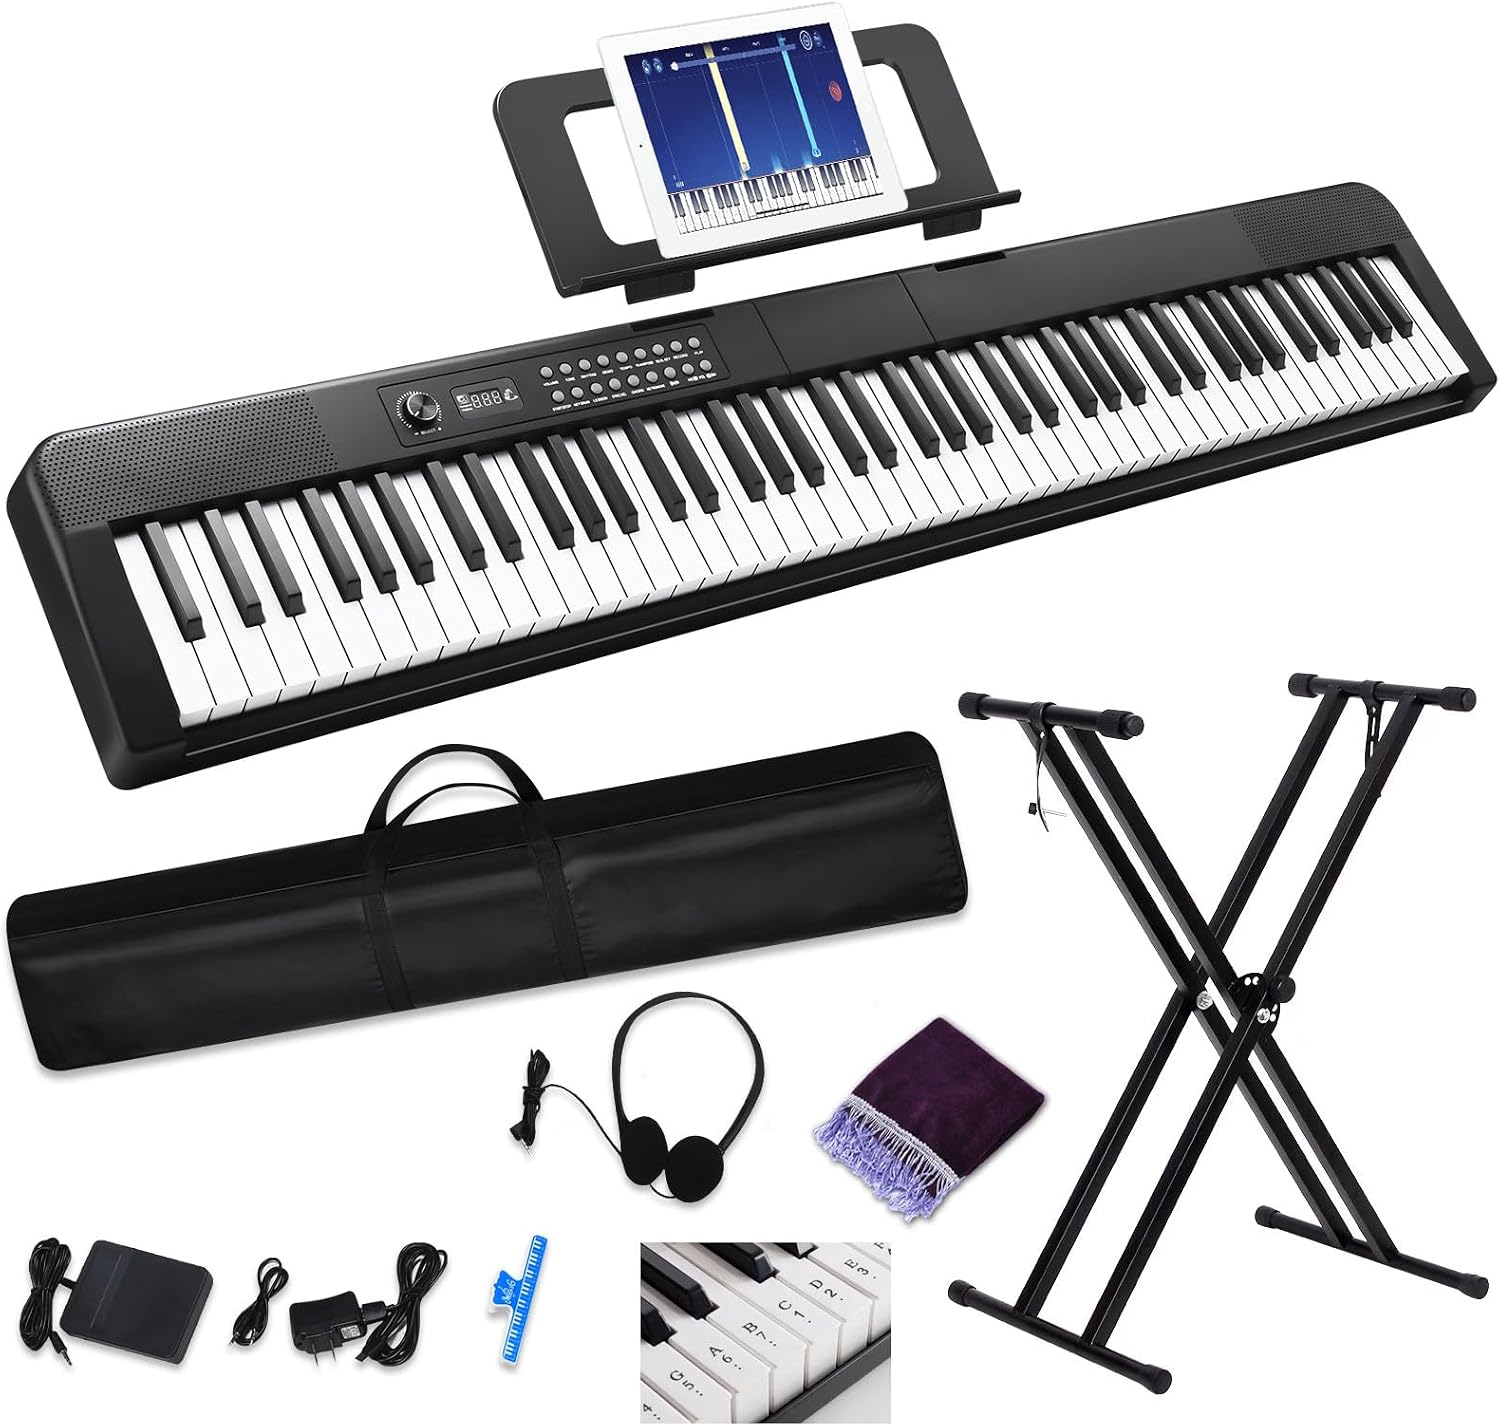
Budget pick: 88 Key Piano Keyboard, Electric Digital Piano with Semi Weighted Keys, Keyboard Piano with Sustain Pedal, Power Adapter, Stand, Carrying Case, Headphones, USB-MIDI Compatibility, for Beginner Adults
 Visit on Amazon →
This is the complete-start bundle, and the completeness is the point. Stand, sustain pedal, power adapter, carrying case, headphones, and USB-MIDI compatibility are all in the box, which means a beginner can go from delivery day to a real practice session without a second shopping trip. Check current Amazon price.
The honest caveat is in the name: semi weighted keys. That is not the same as graded hammer action. The keys have resistance, which is a big step up from a synth-action keyboard, but they will not teach you the finger control that a weighted action teaches. For a first year, an adult returning to piano, or a ten-year-old who might quit in March, that trade is sensible. If the student is already serious and playing repertoire, they will outgrow it, and I would rather they outgrow a bundle than outgrow an expensive mistake.
Flaws but not dealbreakers: Semi weighted keys and a light touch curve out of the box. Set the touch sensitivity to a heavier setting if the instrument offers one, because a light curve lets you get loud without doing any work, which builds exactly the wrong habit.
Best for apartment beginners, adult returners, and parents who want to test commitment before spending real money.
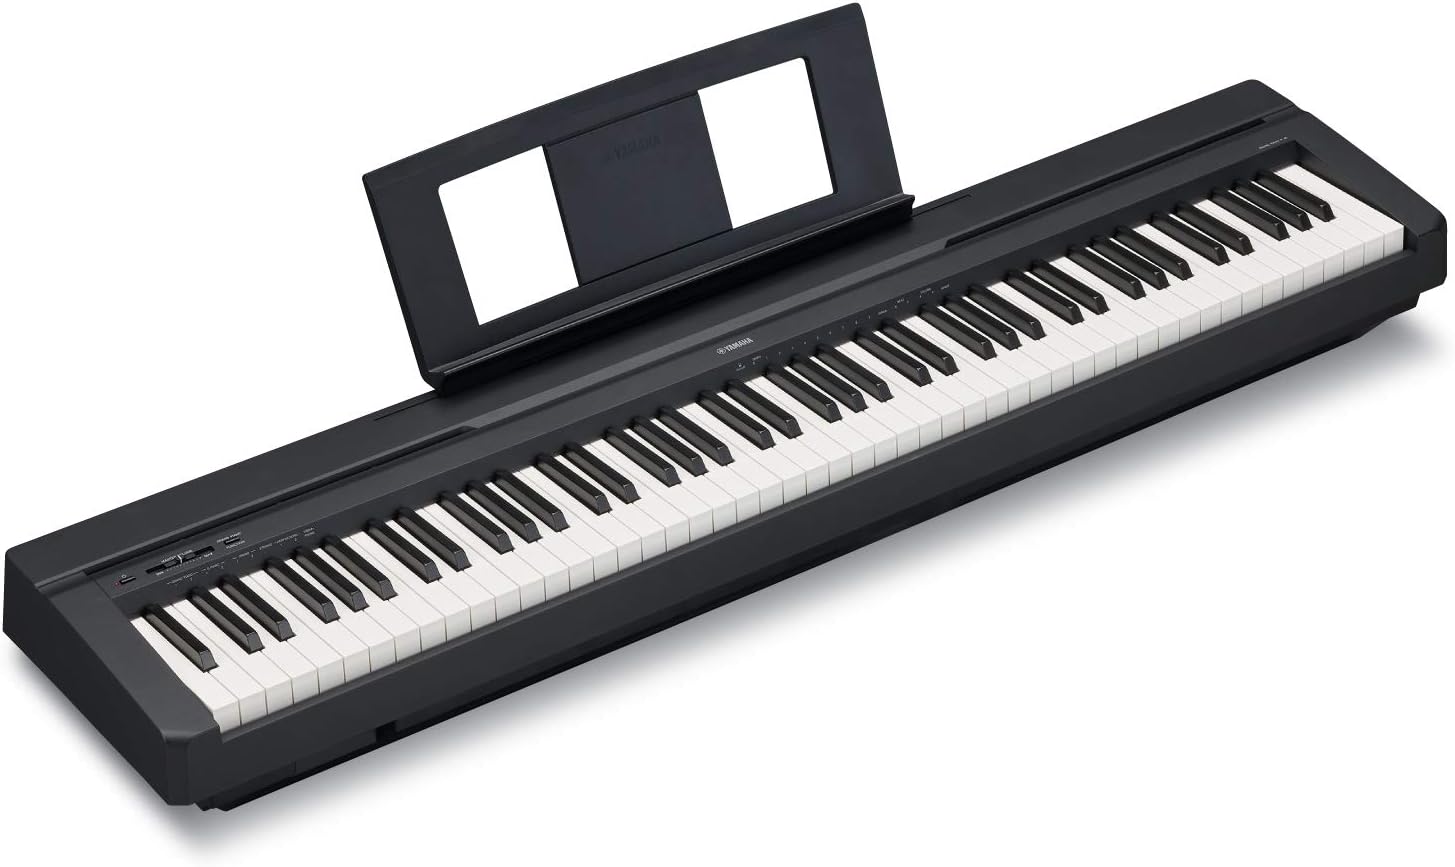
Our pick: Roland FP-30X 88-Note Digital Piano, Black
 Visit on Amazon →
This is the one I name when a student's budget can stretch past the beginner bundles. It is a slab, not a cabinet, which is the smart buy for most people: you are paying for the instrument instead of the furniture around it, and you can carry it to a lesson, a gig, or a new apartment. Check current Amazon price.
I have watched a lot of transfer students come back from summer on whatever they had at home, and the ones who regress are almost always on actions that fight them. The point of recommending an instrument in this class is consistency: an action that behaves the same way at the start of a piece and at the end, and that lets a student play softly without the note disappearing. That consistency is worth more than any feature list, because it is what makes daily practice feel like progress instead of wrestling.
Flaws but not dealbreakers: It is a slab, so price in a stand, a bench, and a pedal you actually trust. The accessories that ship with any instrument in this category are an afterthought, and you will replace them.
Best for a student who has committed, a teacher's home studio, and anyone who needs one instrument that works at home and out of the house.
The setup, step by step
Now the part that decides whether any of this sticks.
Step one: set the height. Sit down and place your hands on the keys. Your elbows should sit level with the tops of the keys, and your forearms should be level or angled very slightly down toward the keys. If your wrists bend upward, the stand is too low. If your shoulders lift to reach, it is too high. Fix this before anything else, because everything else is built on it.
Step two: set the distance. Sit far enough back that your arms are relaxed, not tucked in, and close enough that you are not reaching. A good test: hands in your lap, then bring them to the keys without leaning forward. If you have to lean, move the bench in.
Step three: kill the rocking. Play a loud chord in both hands. If the stand shifts, stop and fix it: tighten every bolt, add felt pads or spikes, put a rug under the feet, and if the stand still flexes, replace it. A piano that moves teaches you to hold back, and holding back is the opposite of what practice is for.
Step four: place the pedal. It goes under your right foot, centered under your right knee, with your heel on the floor. Tape it down, mat it, or grip-tape it. Then practice pressing it without looking down, because a pedal you have to hunt for is a pedal you will not use.
Step five: route the headphones. Extension cable to the front of the instrument, cable clipped or hooked so it is not tugging on the jack. The jack on the back of a unit is a design failure, and a dangling cable is how jacks get broken.
Step six: set the volume and the touch curve. Set the master volume so that a normal practice dynamic sits comfortably in the middle of the instrument's range, not at the top. Then set the touch sensitivity to medium or heavy. A light curve is flattering for five minutes and harmful for five months.
Step seven: check the room. Hard floors and bare walls make every digital piano sound brighter and harsher than it is. A rug and a bookshelf do more for what you hear than most settings menus. This is speaker voicing in practice: the room is part of the instrument.
The first month of practice
Twenty minutes a day beats two hours on Sunday. That is not a motivational slogan, it is how the hands learn.
Start with five-finger patterns and slow scales, listening for evenness. Use a metronome at a tempo where you can play without tension, then raise it by two clicks, not ten. When you add repertoire, play the same two or three pieces every day for a week so you can hear what is actually changing. I use the same three pieces on every instrument I evaluate for exactly this reason: repetition is how you hear the difference between your playing and the instrument's limits.
Add the pedal last. Beginners hide behind the sustain pedal because it covers unevenness, and then they cannot play a clean phrase without it. Learn the notes dry first.
Finally, alternate between headphones and speakers. Headphones reveal your finger noise and your unevenness, which is uncomfortable and useful. Speakers reveal how the instrument actually sounds in the room, which is what your family hears.
What this guide does not cover
I do not cover synthesizers or unweighted keyboards. If you want to play organ parts, produce tracks, or gig with a band that needs pads and leads, an unweighted board is the right tool and this is the wrong article.
I also do not cover cabinet pianos, the console-style instruments that look like uprights. They are lovely and they are heavier, more expensive, and harder to move, and for most apartments a slab plus a good stand wins on both price and moving-day practicality.
And I do not tell you which brand has the best samples, because the differences people argue about online are mostly speaker voicing. Buy the action. The sound will be good enough, and the action is what you touch for the next five years.
What to budget for beyond the instrument
The instrument is not the whole cost, and pretending otherwise is how people end up playing on a dining chair.
Plan for a bench, a stand if your instrument does not include one, a pedal you trust, headphones, and a rug. None of these are glamorous. All of them are load-bearing. The bench and the pedal that ship in a box are, in my experience, the first two things to replace, and replacing them costs less than a single month of lessons.
The math that matters is not the sticker price. It is cost per practice session over the first two years. A bundle that gets played every day is cheaper than a nicer instrument that sits closed, and the setup steps above are what determine which of those two you end up with.
The short version
Buy an instrument with 88 keys and a weighted action, or a semi weighted bundle if you are testing your own commitment. Set the height before you play a note. Kill the rocking. Tape down the pedal. Set the touch curve to medium or heavy. Practice twenty minutes a day with a metronome, add the pedal last, and alternate headphones with speakers.
That is the whole job. The instrument was built to be played. Set it up so that you will.