Most beginner digital pianos are not beaten by their sound engine. They are beaten by their setup.
The bench sits four inches too low, so the wrist collapses every time the student reaches for the top octave. The sustain pedal slides across a hardwood floor on every phrase. The instrument is shoved into a corner at an angle, so the player sits rotated and learns to reach instead of move. Then the touch response is left on whatever curve the factory picked, and on a lot of inexpensive boards that means every note comes out at the same volume no matter how the key is struck.
I have watched that combination end a practice habit inside a month, and I have fixed it in under an hour more times than I can count. This is my 88 key digital piano setup routine for a home practice corner: the order to do things in, the settings I change before a student plays a single note, and the two instruments I currently point beginners toward.
It is not about buying more gear. It is about making the instrument you already own behave like a piano.
Why you should trust me
I have taught piano for 25 years and run a home studio in Seattle where 30 students a week come through the door, plus session work in the evenings. I have owned 12 digital pianos over that stretch, from a cheap starter board I bought in a pinch to a $6,000 slab I still regret selling.
Every instrument that lands in my studio goes through the same routine. The C major prelude from Bach's Well-Tempered Clavier Book I, the E minor Chopin nocturne, and a blues improvisation in F that I have played so many times it has stopped being music. I keep a scale for action weight and a dB meter for speaker output, and I write the numbers in a notebook that goes back to 2011.
What I care about is not the spec sheet. It is whether a transfer student who shows up in June with a slab on a folding stand still wants to practice in August. That question has far more to do with bench height, pedal placement, and touch response than with how many gigabytes of concert grand samples are in the box.
How I picked and how I tested
This is not a ranking of every 88-key instrument on the market. It answers a narrower question: what do you put in a beginner's corner at home, and how do you set it up so the thing actually gets played.
Two instruments ended up in this guide. One is a full-size 88-key slab with a semi-weighted action. The other is a weighted home instrument built into a wooden desk cabinet with a triple pedal. Those are the two shapes most families buy, and they need different setup work.
I run the same checks on both. I play the same three pieces. I check whether the action is consistent from the bottom octave to the top, because a board that turns heavy in the middle of a piece teaches a student to bang. I check key repetition by playing the same note over and over and listening for whether the key returns before my finger does. I check speaker voicing by playing the same chord at three volumes and noticing which register disappears first. I check where the headphone jack lives, because a jack on the back panel of a cabinet instrument is a complaint I will carry to my grave.
What I do not do is trust the carton. "Concert grand sound" printed on a box tells me nothing about how an instrument behaves under a ten-year-old's hands.
What you need before you start
Four things, and only one of them is the piano.
A bench you can raise or lower. This is the single most ignored piece of gear in the category. Sit so your forearms slope very slightly down to the keys and your wrists sit level with or just above the keybed, with both feet flat on the floor. If your shoulders lift to reach the keys, the bench is too low. A stack of cushions is not a bench, and an office chair with arms is worse.
A stand that does not wobble. If the keyboard rocks when you play a two-hand chord, you will spend the next year teaching around the wobble. Adjustable height matters here too, because the stand sets the keybed height when there is no cabinet.
A way to stop the pedal from moving. A rug, a strip of hook-and-loop tape, or a pedal unit attached to the instrument. I do not care which. I care that the left foot can land on the pedal without chasing it.
Headphones with a cable long enough to reach your seat. Practicing on speakers at 9 p.m. in an apartment is how students stop practicing at 9 p.m.
The two instruments I set up most often
One is the slab shape, one is the cabinet shape. Both are 88 keys, which is non-negotiable for anyone who intends to play piano rather than keyboard parts.
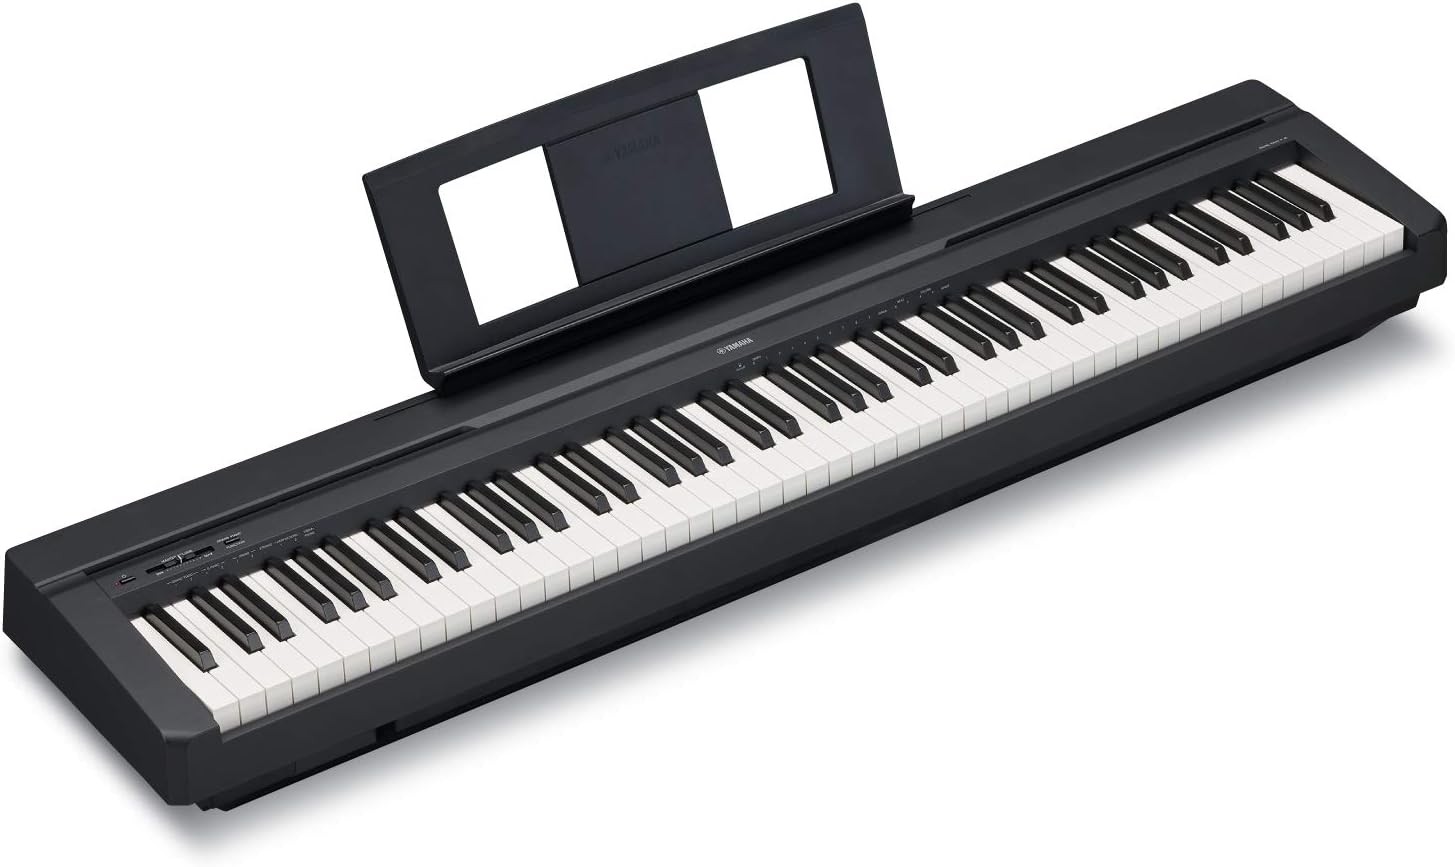
Budget pick: Digital Piano Keyboard 88 Key Semi-Weighted Full Size Electric Piano
 Visit on Amazon →
This is the shape most families start with: a full-size 88-key board with a semi-weighted action. Semi-weighted means the keys have some resistance behind them but no hammer mechanism, so the return is lighter and faster than a graded hammer action. For a seven or eight-year-old with small hands and no strength yet, that is not a flaw. It is often the reason the instrument gets played instead of fought.
The setup work matters more on a board like this than on anything else here. There is no cabinet, so it needs a stand that stays put, and it needs the pedal question solved before the first lesson. Boards in this class commonly ship with a simple sustain switch, and a switch on a smooth floor slides. Put it on a rug or tape it down on day one.
Flaws but not dealbreakers: A semi-weighted action will not build the finger strength a graded hammer action builds, and it will not teach the control that comes from feeling a hammer swing under your hand. If your student is past the first year and practicing daily, treat this as a stepping stone, not a destination.
Families buying for a young beginner who needs something that fits a small room and a small budget should start here.
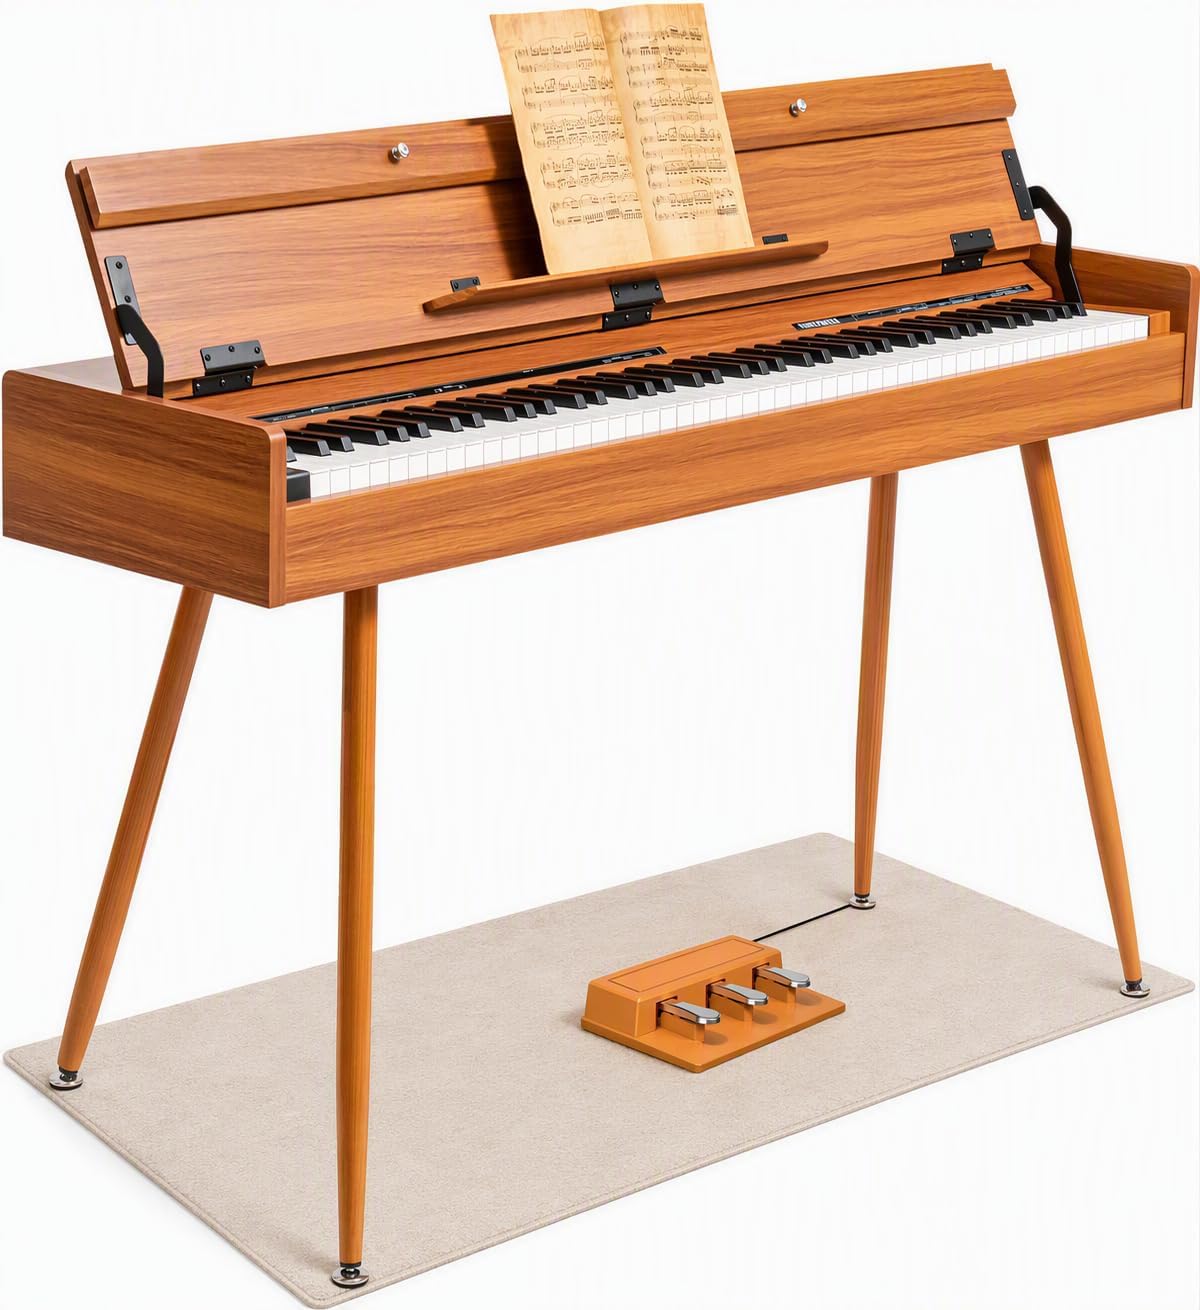
Upgrade pick: UISCOM 88 Key Weighted Home Digital Piano,Wooden Desk Keyboard,Triple-Pedal
 Visit on Amazon →
This is the other shape: a weighted 88-key instrument built into a wooden desk cabinet, with a triple pedal. For a home practice corner, the cabinet solves three problems at once. The pedal unit belongs to the instrument, so nothing slides across the floor mid-phrase. The keyboard sits at furniture height, so you are not re-leveling a stand every time the room gets vacuumed. And it looks like it belongs in a living room, which matters more than anyone admits when the alternative is a slab on an X-stand in the hallway.
Weighted action is the reason to spend here. Resistance under the key changes how a student shapes a phrase, because they can control tone with finger speed instead of just pressing harder. The action in this tier is not the action in a conservatory instrument, and anyone who tells you otherwise has not played both back to back. But a weighted 88-key cabinet with pedals attached is the closest thing to a real practice instrument at the entry level, and it is the one I would choose for a student who is practicing most days.
Flaws but not dealbreakers: The desk shape means it stays where you put it, so measure the space before it arrives and think about whether it fits your next apartment. A weighted action at this level can also feel bouncy if you play deep into the keys at speed, so test one in person if you can.
Students who are past the novelty stage and playing daily will get the most out of this.
The actual setup workflow
Now the part you came for. Do these in order, and do them once. Forty minutes, start to finish.
Step one: pick the spot. The player should sit square to the keys, not rotated. Keep the right side clear so the pedal foot has somewhere to land, and keep the instrument off a wall you have to lean past. If the only open wall faces a television, put a music stand in front of the keyboard and call it done.
Step two: set the keybed height. On a slab, this means adjusting the stand, not the bench. Aim for forearms sloping slightly down to the keys and wrists level with or just above the keybed. On a cabinet instrument the height is fixed, which is exactly why the bench has to be adjustable.
Step three: set the bench distance. Sit so your elbows sit slightly in front of your torso and your hands rest on the keys in a soft curve. You should be able to reach the lowest and highest key by leaning, not by twisting your spine. If the bench is too close, the student plays with flat fingers and no arm weight. If it is too far, they lean in and lose the foot contact.
Step four: anchor the pedal. Play a chord, hold the sustain, then slide your foot toward the piano the way a nervous beginner will. If the pedal moves, fix it now, before the habit forms. On a cabinet instrument with a triple pedal, check instead that the pedal positions match where the student's foot naturally rests. A pedal unit that sits too far right teaches a twisted ankle.
Step five: set the volume once and mark it. Choose a level where a normal melody line can be heard over the sound of the keys themselves, then find a way to keep that setting from drifting. Most beginner problems with "the piano sounds bad" are actually problems with the volume knob sitting at 80 percent.
Step six: set the touch response. Start in the middle of the range, not on the heaviest setting. If quiet playing disappears entirely, move one step lighter. If the student has to bang to get a forte, move one step heavier. Do not use a heavy curve to build strength, because on an inexpensive action a heavy curve teaches tension and a locked wrist.
Step seven: turn off everything automatic. Reverb low or off. Chorus off. Auto accompaniment off. Demo mode locked out if the instrument has one. A student needs to hear their own touch, not a DSP layer covering it.
Step eight: set the metronome. Find the built-in click and set it to a tempo the student can actually play the piece at, which is usually slower than they want. Write the number on the corner of the page.
Step nine: route the headphone cable. Check where the jack is. If it is on the back of a cabinet instrument, run the cable along the side and leave it plugged in so nobody has to crawl behind the piano every evening. Make sure the cable never crosses the keys.
Step ten: play the first three minutes. Warm up with five-finger patterns, then a scale, then the piece. This is the routine the setup exists to serve, and it should feel the same every day.
What to change in the first two weeks and what to leave alone
Change these: bench height, bench distance, pedal anchoring, the touch curve (once, then leave it), and the volume ceiling. Those are physical setup problems and they need to be solved early, before the student adapts to them.
Leave these alone: the sound. Pick one piano voice and stay on it for a month. Auditioning voices every session is a way of not practicing. Leave the transpose function alone as well, unless a young student needs it for a specific piece, because using it to dodge key signatures for a whole term is a habit that costs a year later. Leave the reverb off and leave the lid closed on any settings menu you do not understand.
What this guide does not cover
Some categories are out of scope on purpose. Arranger keyboards and synthesizers with 61 keys are not in this guide, because a student who intends to play piano needs 88 keys and some kind of resistance under the fingers. Cabinets far above the entry tier are furniture with a piano inside, and if you are shopping there you already know what you want. Recording interfaces and studio gear belong to a different conversation entirely.
I also do not cover the bench and the pedal that ship in the box, because in this price range they are usually the weakest parts of the package. Budget to replace the bench first, then the pedal.
The short version
Set the keybed so the forearms slope slightly down. Set the bench so the feet are flat. Anchor the pedal. Put the touch curve in the middle. Set the volume once and stop touching it. Pick one sound. Keep the headphones within reach.
That is the whole job, and none of it involves the sample library. A well-set-up inexpensive instrument gets played every day. A badly set-up expensive one gets covered with laundry. Set it up properly the first afternoon, and then leave it alone and practice.