Most beginner pianos fail in the first month, and it is almost never the sound engine's fault. An 88-key digital piano setup that puts the bench too low, aims the speakers into a wall, and leaves the sustain pedal skating across hardwood will end a ten-year-old's interest faster than any sample library can rescue it.
I have taught piano in Seattle for 25 years and run a home studio where I teach 30 students a week and record session work. Every September I meet transfer students who spent the summer on an instrument set up so badly that they learned to fight it: shoulders up around their ears, wrists collapsed, one foot chasing a pedal across the floor. The piano was fine. The room was wrong.
This is the setup guide, not the shopping guide. You already own the instrument, or a box is arriving this week. Here is how to get it into a room at the right height, with the right connections, so the first month of practice actually happens.
Why you should trust me
I have owned 12 digital pianos, from a $200 starter to a $6,000 slab, and I have taught on all of them. My teaching studio has three instruments in it at any time, and my own practice happens on a digital most nights, even though there is an acoustic grand in the next room.
My position has not changed in 20 years: the action is the piano. Samples, speakers, Bluetooth, and app support are features layered on top of it. When a parent asks me why their child's hands collapse at home but not in my studio, the answer is usually the bench height or the key weight, not the child.
What I listen for in a teaching instrument is boring and specific. Does the key come back up fast enough for repeated notes? Does the action get heavier or lighter as you play deeper into a piece? Does the pedal stay where I put it? Can a student reach the headphone jack without standing up? Those four questions decide more lessons than any spec sheet.
What the room needs before you plug anything in
Pick a wall, not a corner. A digital piano pressed into a corner doubles the low end and makes everything sound muddy, which is exactly the kind of thing that makes a student think they are playing badly.
You want an arm's length of space behind the instrument if it has rear-facing speakers, a power outlet that does not require an extension cord across a walking path, and a surface that is not bare hardwood if you can help it. A rug under the pedal end solves half the problems in this guide.
You also want a bench that adjusts. The bench and the pedal that ship in the box are the two weakest pieces of any starter package. Budget for replacing them and you will skip a month of bad habits.
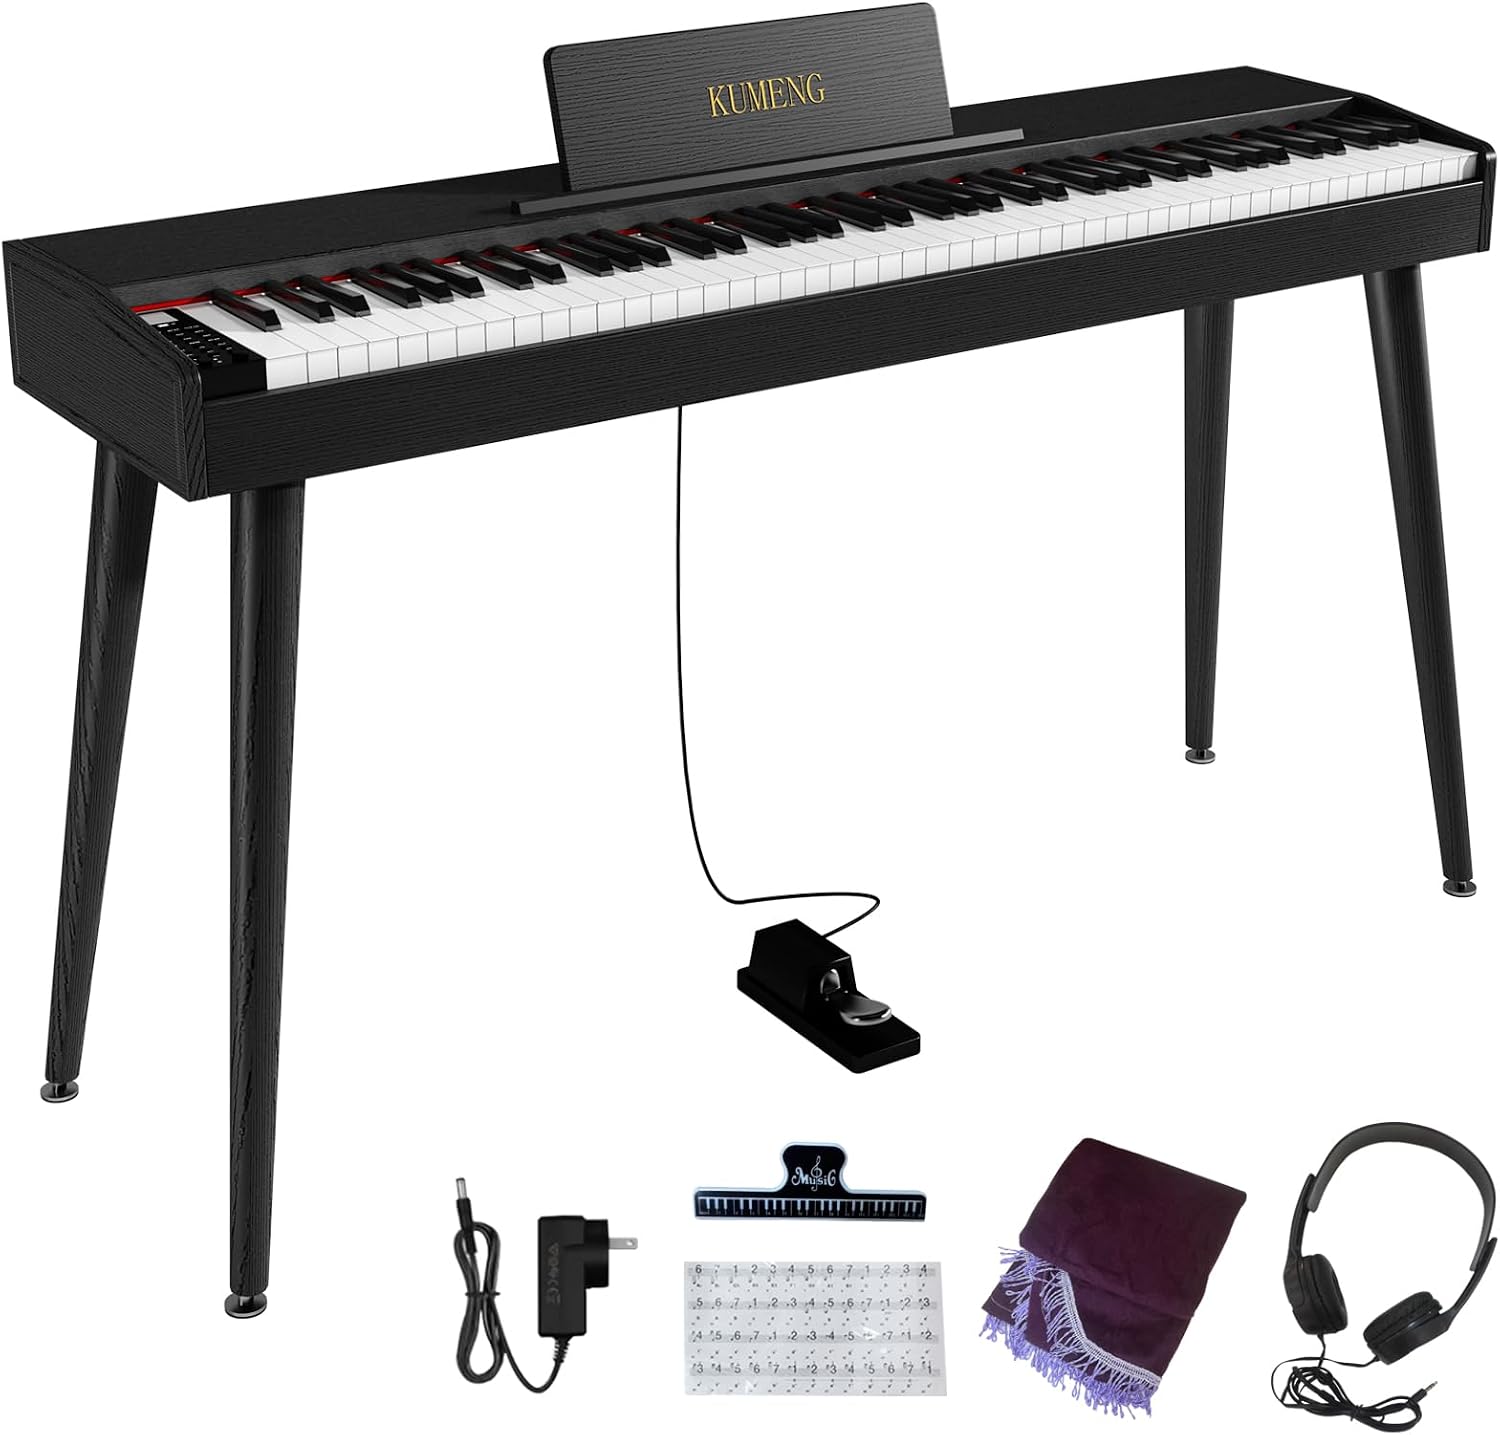
The instrument: Digital Piano 88 Key Semi Weighted Keyboard, Electric Piano
 Visit on Amazon →
This is the entry tier, and it is the tier most families should start in. You get the full 88 keys, which matters more than anything else on this list, because a student who learns on 61 keys will spend a year avoiding the top and bottom of the keyboard and then panic when real repertoire sends them there.
Semi-weighted is the honest description of the action. The keys push back a little, but there is no hammer mechanism, so the resistance does not build the way it does on a graded hammer instrument. What that means in practice: it is fine for a first year of note reading, hand position, and rhythm. It is not the instrument I would want a third-year student practicing Chopin on.
Flaws but not dealbreakers: The sustain pedal that comes in the box is the usual thin slab-style switch, and it will slide. Put it on a rug, or tape it down, or replace it. Also check where the headphone jack sits before you build a habit of reaching for it. Jacks on the back of the unit are a genuine annoyance for a student practicing at 9 p.m. in an apartment.
Check current Amazon price. At the entry tier, the value question is not whether it sounds like a concert grand. It is whether a nine-year-old will sit down at it without being asked.
Anyone buying for a beginner in an apartment, a dorm, or a shared house should start here.
The cable: AGVEE 6.6ft Lightning MIDI Cable, 8 Pin to USB-B Cord
 Visit on Amazon →
This cable does one job: it connects a Lightning iPhone or iPad to the USB-B port on the back of a digital piano, the squarish port usually labeled "USB to host." With it, an app can see which notes your student played and when, which is the entire basis of every practice app worth using.
The 6.6-foot length is the reason I would pick this one over a shorter cable. It is long enough to let the tablet sit on a music stand or a small table beside the piano instead of dangling off the front of the instrument by a six-inch stub. Students knock tablets off pianos constantly.
Flaws but not dealbreakers: This is a Lightning connector, so it is for older iPhones and iPads, not the USB-C models. Check your tablet before you order. It is also a data cable, not an audio cable, so it will not send the piano's sound anywhere. And not every digital piano has a USB-B host port, so look at the back of yours first.
Check current Amazon price. It is the cheapest upgrade in this entire guide and the one that turns a piano into something a student can play along with.
Anyone whose student practices better with a screen in front of them should add this on day one.
The actual setup workflow
Now the part you came for. This takes about an hour and it works on almost any 88-key slab.
Step one: Set the bench height first. Sit down and let your arms hang. Your elbows should land roughly level with the tops of the white keys, and your forearms should be close to horizontal. If your wrists bend upward to reach the keys, the bench is too low, and that is the single most common setup error I see in homes. Add a cushion or lower the bench before you touch anything else.
Step two: Set the distance. Sit at the front half of the bench, not perched on the edge and not slumped back against it. Your knees should clear the underside of the keyboard, and your hands should reach the extremes of the keyboard without leaning your torso. If you have to lean to reach the top octave, you are too close.
Step three: Deal with the pedal. Put the pedal where your right foot naturally lands, not where the cable forces it. If the pedal slides, fix that today. A rug under the pedal end, a strip of grip tape, or a replacement pedal with a heavier base all work. A sliding pedal teaches a student to stab at it, which is a habit that takes a year to undo.
Step four: Route the headphones. Plug them in once and figure out where the cable hangs, then leave a hook or a clip for it. If the jack is on the back of the unit, run the cable around the side and secure it. Students who have to grope behind the piano to plug in headphones will simply play too loud instead.
Step five: Find the touch sensitivity setting. Most digital pianos ship with a default velocity curve that is either too easy or too stiff. Set it to the middle setting and then listen: if your student can play a soft note without the sound cutting out entirely, the curve is close. If every note comes out at the same volume no matter how they play, drop the sensitivity a notch.
Step six: Set the volume once, then mark it. Turn the volume up until a firm chord is loud but not painful, then mark the knob with a piece of tape. Most home practice happens at a volume that is either whisper-quiet or far too loud, and both distort how the student learns to control dynamics. Do not judge the instrument from three-inch speakers at point-blank range; step back a few feet, where the sound actually develops.
Step seven: Connect the tablet. Plug the Lightning end into the device and the USB-B end into the piano's host port, then open the app and confirm it registers notes when you press keys. If nothing registers, try another app before you assume the cable is dead. If the app sees the notes but you hear nothing, check that the piano's local sound is on; the cable carries data only.
Step eight: Set the first week's routine. Three short sessions beat one long one. Ten minutes of scales or five-finger patterns, ten minutes on the current piece, five minutes of something the student actually likes. Write it on a card and tape it to the wall above the piano.
The mistakes I see in the first week
- Bench too low. Nearly universal, and it produces collapsed wrists within a month.
- Pedal down all the time. Beginners hold it because it makes everything sound bigger. Teach them to lift their foot completely between changes.
- Headphones still plugged in. The piano looks broken, the student panics, and nobody checks the jack.
- Playing at maximum volume. It hides unevenness in touch, which is the exact thing a beginner needs to hear.
- Sitting at the very edge of the bench. It forces the shoulders forward and shortens the reach.
What I left out of this guide and why
Cabinet-style pianos are a different purchase with a different setup. If you are buying furniture that happens to make sound, you want an assembly guide and a two-person lift, not this article.
Replacement benches and pedals deserve their own breakdown, and so do practice apps, because the app market changes every few months while the setup rules do not.
Stands are the one item I will mention here: if the slab wobbles when your student plays a forte chord, fix the stand before the next lesson. A moving keyboard teaches a light touch for the wrong reason.
What this all costs
There is no way around it: the instrument is the big line item, and everything else in this guide is small. A bench and a pair of headphones together often cost less than a month of private lessons, and they change how much the student gets out of every one of those lessons.
Think of it as cost per practice session. The piano gets played most days for years. The cable gets used every time the tablet comes out. The rug under the pedal costs almost nothing and prevents a habit that costs months to correct.
That is the job. The instrument was built to be practiced on. Set it up so it gets practiced.